When it comes to sweet indulgences, chocolate-dipped cookies top the list. They’re visually appealing, delectable, and surprisingly easy to make when you know the right steps. Whether you’re preparing for a special occasion or simply treating yourself, mastering the art of chocolate dipping can elevate your baking game. This article covers everything from choosing the right chocolate to troubleshooting common issues, ensuring you achieve that glossy, professional finish every time.
Introduction to Chocolate Dipping
What Is Chocolate Dipping?
Chocolate dipping is a technique used to coat cookies, fruits, or other treats in a smooth layer of melted chocolate. It’s not just about taste—it’s about creating a visual masterpiece that wows the eye as much as the palate. With a little finesse, you can turn a simple cookie into a decadent dessert.
This process involves melting high-quality chocolate, dipping the item of choice, and allowing it to set into a shiny, hard shell. It’s not only a fun and creative activity but also an easy way to add a touch of sophistication to your baked goods.
Why Perfecting the Technique Matters
Ever seen uneven chocolate or streaks ruining the look of a cookie? That’s where technique makes all the difference. Mastering the basics ensures:
- An even coating that clings perfectly to the cookie.
- A glossy finish that looks as good as it tastes.
- A delightful texture that complements the cookie’s crunch.
Plus, when you know how to dip cookies in chocolate perfectly, your creations are guaranteed to impress friends and family.
Overview of Essential Tools and Ingredients
To get started, you’ll need:
- Couverture chocolate (or high-quality baking chocolate).
- A double boiler or microwave-safe bowl.
- Wax or parchment paper for setting dipped cookies.
- A cooling rack for a professional finish.
- Optional: Decorations like sprinkles or edible glitter for added flair.
Pro tip: Always opt for the best chocolate you can afford—couverture chocolate is a game-changer because of its high cocoa butter content, which ensures a silky texture and shiny finish.
Choosing the Right Chocolate
Types of Chocolate for Dipping
When learning how to dip cookies in chocolate perfectly, the choice of chocolate is key. The three main types of chocolate—dark, milk, and white—each bring unique flavors to the table:
- Dark Chocolate: A rich and less sweet option, ideal for balancing sugary cookies like shortbread.
- Milk Chocolate: A crowd-pleaser with a creamy, sweet taste, perfect for all cookie types.
- White Chocolate: Although not technically chocolate, it adds a sweet, buttery finish to cookies.
For the best results, opt for couverture chocolate. Its higher cocoa butter content ensures a smoother texture and glossy finish.
Couverture Chocolate: The Professional Choice
Professional bakers often swear by couverture chocolate for dipping. Why? Because its fine grinding and high cocoa butter content make it easy to melt and coat evenly. If you’re serious about achieving a professional sheen on your cookies, this is your go-to option. Bonus: It’s easy to temper, which prevents unsightly chocolate bloom.
Adding Flavor Enhancements to Chocolate
Give your dipped cookies a flavor boost by mixing in:
- Extracts: Vanilla, almond, or orange extracts complement the chocolate’s richness.
- Spices: A dash of cinnamon or chili powder adds a unique twist.
- Liquors: A splash of Grand Marnier or coffee liquor can take your cookies to gourmet status.
Looking for inspiration? Check out Chocolate Dipped Shortbread Cookies for a guide on pairing cookies with the right chocolate.
Preparing Chocolate for Dipping
Melting Techniques: Stovetop, Microwave, and Double Boiler
Melting chocolate correctly is a pivotal step in how to dip cookies in chocolate perfectly. Here’s a breakdown of the best methods:
- Stovetop: Use a double boiler to gently melt chocolate without burning it.
- Microwave: Heat in 15-second intervals, stirring between each, to avoid scorching.
- Double Boiler Hack: Place a heatproof bowl over a pot of simmering water. This indirect heat keeps the chocolate at an optimal temperature.
How to Thin Chocolate for Smooth Dipping
If your chocolate feels too thick for dipping, thin it out! Add:
- Cocoa Butter: A professional solution for silky smoothness.
- Vegetable Oil: A quick and accessible fix for thinning chocolate.
Remember, a smooth consistency is vital for that flawless coat.
Best Practices for Maintaining Consistent Temperature
Consistency is everything when dipping cookies. Keep your chocolate warm but not too hot:
- Use a thermometer to maintain 88–90°F for dark chocolate and 84–86°F for milk or white chocolate.
- Stir frequently to prevent clumps and ensure an even melt.
For more detailed steps, visit What Kind of Chocolate Is Best for Dipping?. This resource provides expert tips for selecting and preparing dipping chocolate.
Perfect Dipping Techniques
How to Hold and Dip Cookies for Even Coverage
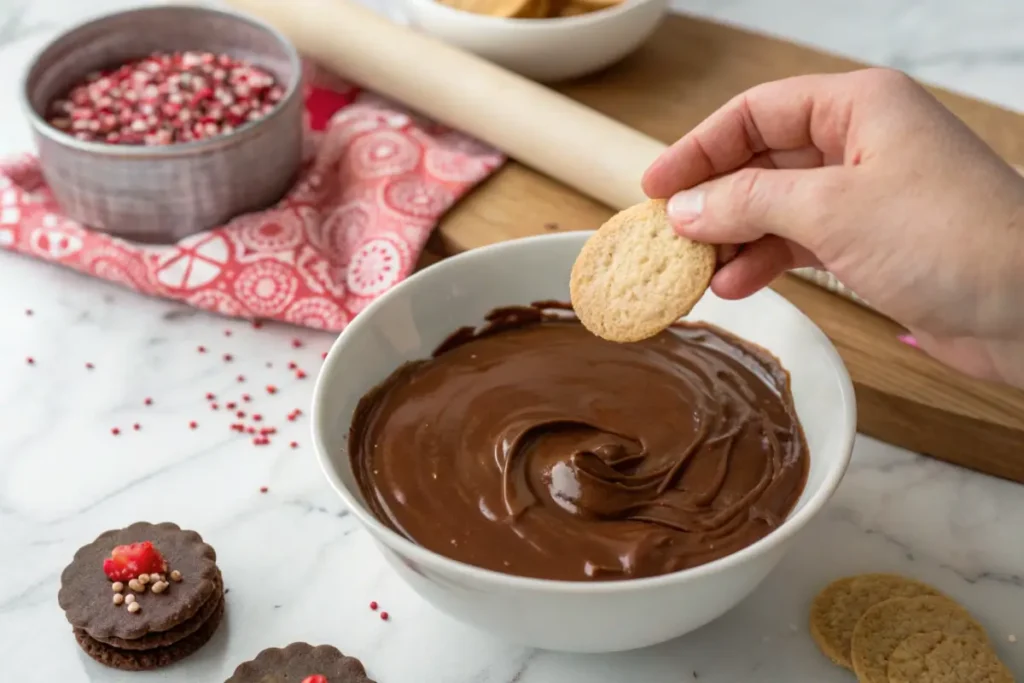
Learning how to dip cookies in chocolate perfectly involves mastering your dipping technique. Start by holding the cookie at an angle using tongs or your fingers (if it’s sturdy). This ensures you have better control over the dipping process. Dip one half of the cookie into the melted chocolate, letting it coat evenly.

Here are a few tips for even coverage:
- Gently tilt the bowl to create a deeper pool of chocolate for larger cookies.
- Allow excess chocolate to drip back into the bowl by lightly tapping the cookie against the edge.
- For a seamless finish, avoid scraping the bottom of the cookie too hard against the bowl.
Preventing Clumps and Ensuring a Smooth Finish
Nobody wants clumpy, uneven chocolate on their cookies. To avoid this, make sure your chocolate is at the right consistency—smooth, silky, and warm, but not hot. Stir the chocolate frequently to maintain an even texture.
Also, avoid over-dipping. A single, quick dip works best to prevent chocolate buildup. Rotate the cookie slightly as you lift it from the chocolate to ensure no thick globs remain.
Dealing with Excess Chocolate
Excess chocolate can be tricky, but it’s easy to manage:
- Use a skewer or fork to gently scrape off extra chocolate on the edges.
- Place dipped cookies on parchment paper or a wire rack to set.
- Clean the edges with a small spatula or butter knife if needed for a polished look.
For more inspiration, check out our recipe article, Chocolate-Dipped Shortbread Cookies, to see these techniques in action.
Tips for Enhancing Presentation
Using Decorations Like Sprinkles, Drizzles, and Edible Glitter
Presentation can take your chocolate-dipped cookies from good to great. While the chocolate is still wet, sprinkle decorations like:
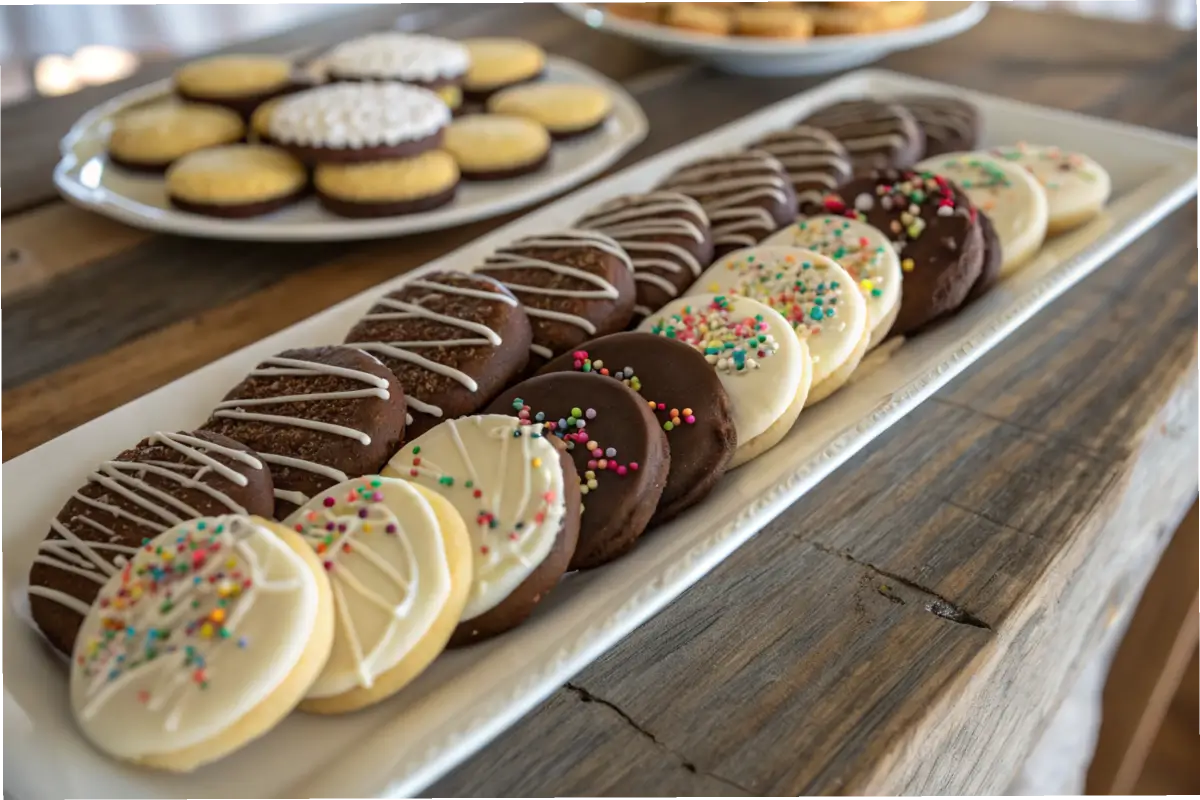
- Colorful sprinkles for a playful touch.
- Edible glitter to make cookies sparkle.
- Crushed nuts or coconut flakes for added texture and flavor.

To add a drizzle effect, dip a fork into contrasting melted chocolate (e.g., white over dark) and wave it over the dipped cookies in a zigzag pattern. This adds a touch of elegance and a layered look.
Best Cooling and Setting Techniques for Chocolate-Dipped Cookies
Set your dipped cookies properly to avoid smudges and ensure a glossy finish:
- Place cookies on wax or parchment paper to prevent sticking.
- Let them cool at room temperature for 30 minutes.
- For a quicker set, refrigerate them for 10–15 minutes.
Avoid freezing, as this can cause the chocolate to crack or develop condensation.
Packaging Ideas for Gifting or Storing
Dipped cookies make excellent gifts! Arrange them in a decorative box lined with wax paper to prevent sticking. If storing, layer cookies between sheets of wax paper in an airtight container. This keeps them fresh and ensures their presentation stays intact.
Troubleshooting Common Issues
Chocolate Bloom and How to Prevent It
One of the most common challenges when learning how to dip cookies in chocolate perfectly is dealing with chocolate bloom. Bloom appears as whitish streaks or spots on the chocolate, caused by fat or sugar rising to the surface. While it doesn’t affect taste, it does ruin the look.
To avoid bloom:
- Temper Your Chocolate: Proper tempering keeps the cocoa butter crystals stable, ensuring a shiny finish.
- Control Temperature: Keep the chocolate warm but not overheated during dipping. Sudden cooling can also cause bloom, so allow the cookies to set at room temperature before refrigeration.
What to Do If Chocolate Hardens Mid-Dipping
Sometimes, the chocolate begins to harden before you’re done. Don’t worry—there’s an easy fix!
- Gently reheat the chocolate using a double boiler or microwave in short intervals.
- Add a small amount of cocoa butter or vegetable oil to restore its smooth texture.
- Stir thoroughly to ensure even melting.
Pro tip: Keep your chocolate warm by placing the bowl over a pot of simmering water as you dip.
Fixing Uneven or Streaky Chocolate
Uneven coatings or streaks can be frustrating. To fix these issues:
- Ensure the chocolate is fully melted and thinned before dipping.
- Rotate the cookie while lifting it from the chocolate for an even finish.
- For streaks caused by cooling, gently warm the surface with a heat gun or hair dryer set on low.
By following these tips, you can handle most common challenges and still achieve that professional, glossy look.
FAQs
Why Is My Chocolate Too Thick for Dipping?
If your chocolate feels too thick, it may need thinning. Add a teaspoon of vegetable oil or melted cocoa butter to achieve the right consistency. Stir well and test by dipping a spoon to ensure smooth coverage.
Can I Use Regular Chocolate Chips for Dipping?
Yes, but with a caveat. Regular chocolate chips are designed to hold their shape when baked, so they may not melt as smoothly. Adding a bit of vegetable oil can help, but for the best results, choose couverture chocolate.
How Long Do Chocolate-Dipped Cookies Last?
When stored in an airtight container, chocolate-dipped cookies can last up to two weeks at room temperature. For longer storage, refrigerate them, but allow them to come to room temperature before serving to avoid condensation.
Conclusion and Key Takeaways
Recap of Essential Tips for Chocolate Dipping
Learning how to dip cookies in chocolate perfectly requires a mix of preparation, patience, and practice. From choosing the right type of chocolate to mastering the dipping technique, every step contributes to your final result. Remember:
- Always use high-quality chocolate, like couverture chocolate, for the best texture and shine.
- Melt and thin the chocolate properly to avoid clumps or streaks.
- Pay attention to temperature throughout the process to maintain a smooth consistency.
With these tips, you can create beautifully coated cookies that look as good as they taste.
Encouragement to Experiment with Custom Designs
Now that you’ve got the basics down, it’s time to get creative! Try experimenting with different toppings like edible glitter, crushed nuts, or a drizzle of contrasting chocolate. Mix and match cookie types with flavored chocolates to craft unique combinations.
Whether you’re making treats for a party or just indulging yourself, these methods will elevate your creations to bakery-quality masterpieces.
For more sweet inspiration, explore other dessert ideas on our website. With practice, you’ll soon become the go-to expert for chocolate-dipped delights!
Additional Recipes and Resources
Explore Related Recipes
While mastering how to dip cookies in chocolate perfectly, don’t stop there. Chocolate-dipping is a versatile technique you can apply to other treats, like pretzels, fruits, or marshmallows. For inspiration, explore our guides on:
- Chocolate-Dipped Shortbread Cookies: A simple yet elegant treat.
- What Kind of Chocolate Is Best for Dipping?: Tips for selecting the perfect chocolate.
Step Into Advanced Techniques
Ready to take your skills to the next level? Try tempering chocolate for a professional finish, or experiment with multi-layered dipping for a gourmet touch. These techniques can be applied to a variety of baked goods, making your desserts stand out.
For additional resources, visit our website’s dessert section for detailed recipes and pro-level tips. From cookies to cakes, there’s always something new to learn and try!
With this comprehensive guide, you’re well-equipped to dip cookies like a pro. Have fun experimenting, and enjoy the delicious results!

